
Capturing great Blog photos
The world of blogging has become HUGE in the last few years. It seems that everyone has a blog. There are so many types of blogs too...craft blogs, cooking blogs, travel blogs, family blogs and on and on. I don't know about you but one of the reasons I find myself going back to the same blogs over and over again has a large part to do with the quality of their photos. I find that if a blog doesn't have beautiful pictures or even just decent ones, I'm a little turned off and I don't end up going back to visit that blog. Am I the only one who feels like this? I'm guessing not, but you can let me know if I'm way off! :)
This past week a friend of mine had a baby shower so I decided to make her a baby blanket. I took some pictures along the way to give you some tips and ideas of how to take good "blog worthy" (as my hubby likes to say) photos. I geared this post toward taking good pictures to use in tutorials and in selling an item.
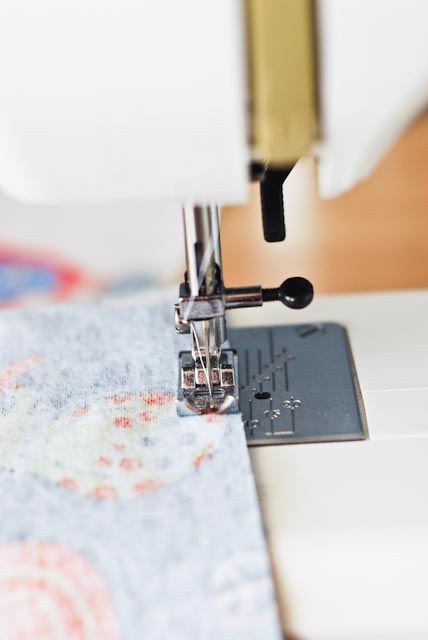
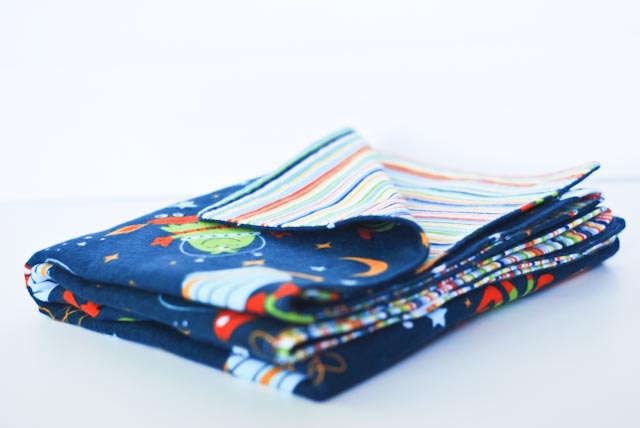
First and foremost...use natural light. Taking a picture using a flash tends to produce cold and uninviting photos. The image below is taken using the light coming in from the nearby window.
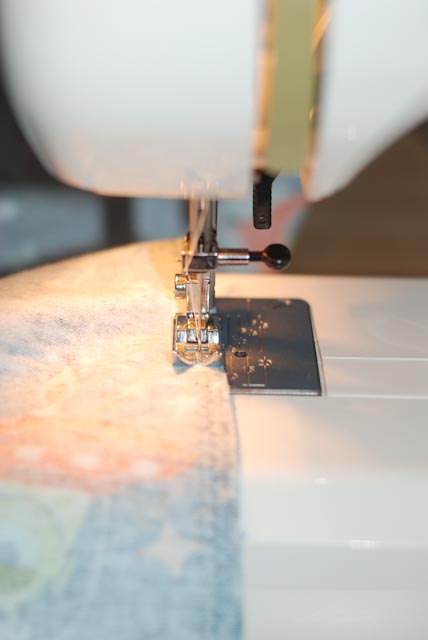
 Now compare the above image to the image below. The following image was taken using a flash. See the difference?
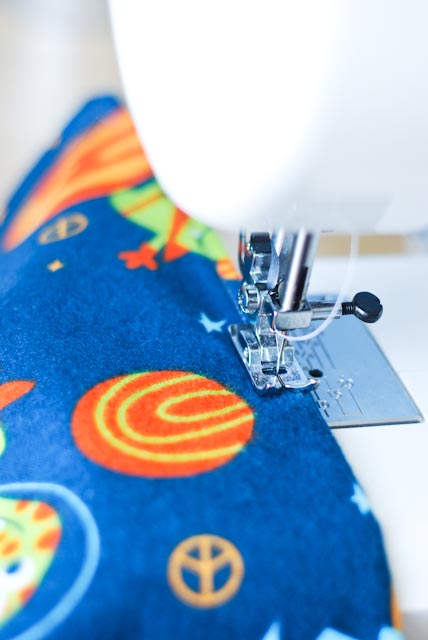
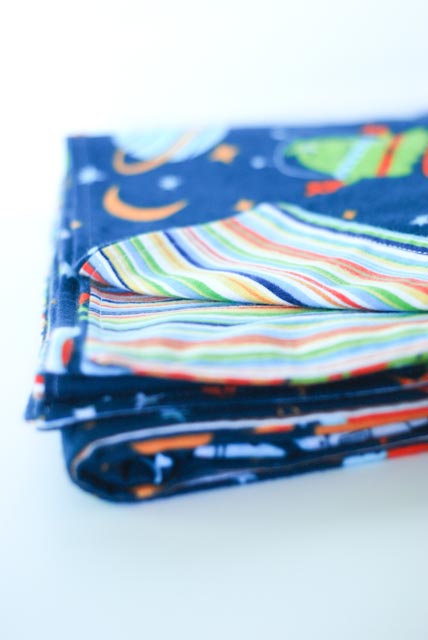
The next tip has to do if you are posting a tutorial or giving your readers some type of step-by-step instructions. Try and show your reader the details of what you are explaining. For example if I were explaining how to make this blanket it would be helpful to show the following picture as I was explaining how to leave a small opening in one of the sides to pull the blanket right side out.

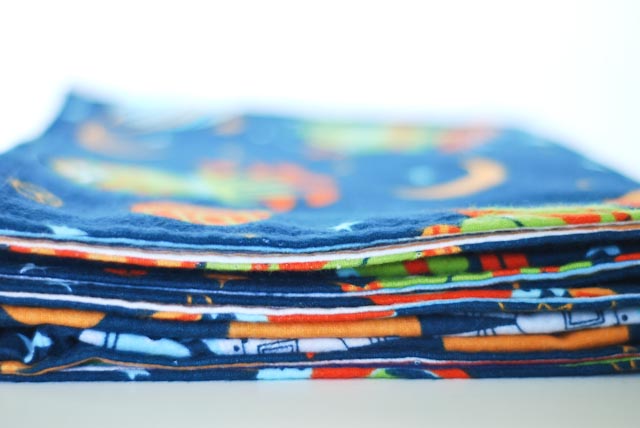
Another tip to keep your images fresh and appealing is to try different angles. This shot would have been fine straight on but by changing the camera angle just slightly it adds a fresh dimension.
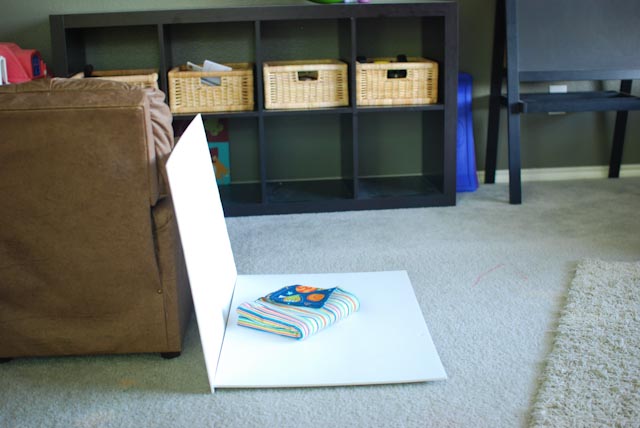
When it comes to displaying your final piece to either sell or to show off here are a few keys to remember. First is to DECLUTTER your background. So many times I see a really cool project but the picture is detracting from the actual project due to the clutter in the background. A good tip is to use a couple of white foam boards to display your projects. And as a bonus, besides giving you a simple clean place to take your photos, using white will help draw more light thus giving you a faster shutter speed which will in turn give your sharper images. (confused? I explain all this in my photo ebook!)
The image below is to give you an idea of my set up when using the foam boards...
 If you had a very small item to photograph you could even use a few pieces of cool scrapbook paper as a background.
Next, when presenting your piece, show your viewer many different angles and view points. If you're selling the item think of the different things you would want to check out if you were looking at it in the store. Use a very low f-stop like 1.8 or 2.2 to showcase the details.
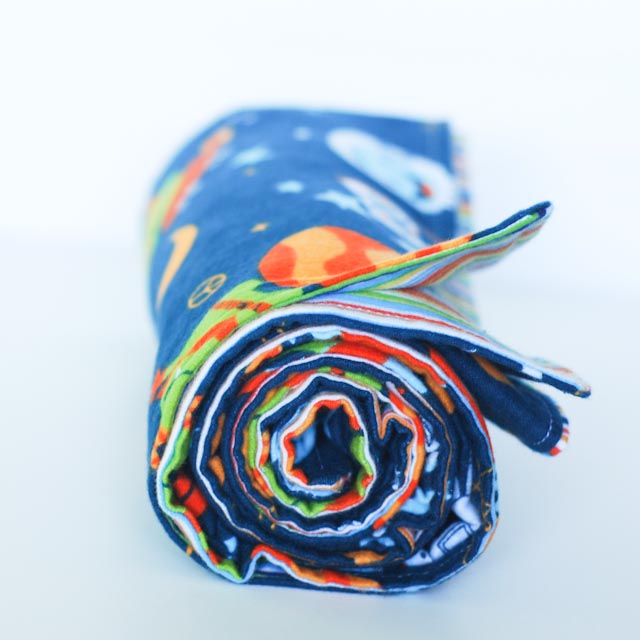
Overall try to keep your photos looking artistic. Many times that's what really sells the product...the artistry of the photo!
This past week a friend of mine had a baby shower so I decided to make her a baby blanket. I took some pictures along the way to give you some tips and ideas of how to take good "blog worthy" (as my hubby likes to say) photos. I geared this post toward taking good pictures to use in tutorials and in selling an item.
First and foremost...use natural light. Taking a picture using a flash tends to produce cold and uninviting photos. The image below is taken using the light coming in from the nearby window.
 Now compare the above image to the image below. The following image was taken using a flash. See the difference?
The next tip has to do if you are posting a tutorial or giving your readers some type of step-by-step instructions. Try and show your reader the details of what you are explaining. For example if I were explaining how to make this blanket it would be helpful to show the following picture as I was explaining how to leave a small opening in one of the sides to pull the blanket right side out.

Another tip to keep your images fresh and appealing is to try different angles. This shot would have been fine straight on but by changing the camera angle just slightly it adds a fresh dimension.

When it comes to displaying your final piece to either sell or to show off here are a few keys to remember. First is to DECLUTTER your background. So many times I see a really cool project but the picture is detracting from the actual project due to the clutter in the background. A good tip is to use a couple of white foam boards to display your projects. And as a bonus, besides giving you a simple clean place to take your photos, using white will help draw more light thus giving you a faster shutter speed which will in turn give your sharper images. (confused? I explain all this in my photo ebook!)
The image below is to give you an idea of my set up when using the foam boards...
 If you had a very small item to photograph you could even use a few pieces of cool scrapbook paper as a background.
Next, when presenting your piece, show your viewer many different angles and view points. If you're selling the item think of the different things you would want to check out if you were looking at it in the store. Use a very low f-stop like 1.8 or 2.2 to showcase the details.


Overall try to keep your photos looking artistic. Many times that's what really sells the product...the artistry of the photo!


12 comments:
Katie!! When you set up your foam boards in front of the window to get some good light, where the heck do you stand to get the picture but not put shadows on the thing you are taking a picture of! I think you should make a tutorial.
hi katie :) i'm a new-ish reader and i love all your great tips...i totally know what you mean with on the blogs with good photos...i tend to stray away too. thanks again for the grea info :)
Hi Katie!I am a new reader from Greece, already bought your e-book and waiting for my camera to start taking pictures!thank you for all your great info and tips!
Katie! Thank you so much for this usefull post. Hope to win your book on the giveaway from happy together :)))
Fantastic tips! I'd love to get some tips on taking photos of cards and scrapbook pages. :-)
It's going to take me forever to read all of your posts. I love your blog so much...the tips and tricks, advice, photos, inspiration, and much more!!! I would like to know a few things if you are up to answering or posting about them... or linking me to a post of you already have.
I have 3 kids. Sometimes my photos seemed to be "staged" how can I get them to not looked staged?
Also, love love love the way a person is standing in front of the sun and the rays or I guess the glow is captured behind them...I have NO IDEA how to do this...
Thank you for such an awesome and inspiring blog :)
HI Sharin!
I'm so glad you've found my blog to be helpful! As far as how to make someone looked "not staged"...Really in just comes down to not staging them! I rarely tell my subject where to stand, how to sit, or what to look like. I let them be in and then try to capture them in their natural state. I will, however, give them some cues such as, "Okay, hold hands", "on the count of 3 jump in the air", "whisper something in your brother's ear", etc. This usually gives them an action to do without making them looked posed. Does that make sense?
As far as back lighting...What you do is expose the picture for your subjects thus making your background (where the sun is shining through) overexposed. I explain how to do this in detail in my photography book. http://thekeytotakingpictures.com/
I hope this helps!
Thank you for the tips,it help me a lot as a beginner in the world of PHOTOGRAPHY.Inkjet Paper
I love your posts.
Most useful blog ever!
These are great tips, and just what I've been in need of!! Xoxo, Jess
Post a Comment